Thursday, May 3, 2012

HUGE Frame!!!


I purchased this poster of our family off of Paper Coterie, I LOVED it!! But, how do I display it??? I got an inspiration off of PINTEREST...I saw this great tutorial that Monica and Jess did over at East Coast Creative. I needed it done on a smaller scales then they did...so I made a template out of poster board, traced it on my wood and cut it out with my jig saw. I also wanted it to have more color. I am in LOVE with grey and white right now..so I choose those colors to do my stripe. I wanted to use a molding to frame the picture to give it more of a framed look...I was just going to do white. But, my husband said it would look good yellow to contrast with the picture...WHAT?!?!?! What a great idea...check one for the husband. He was a very proud being color blind making a decision 
that I used :0)
I LOVE when a vision in my head turns out..YAY!!!


Friday, February 24, 2012

Birthday Gift...


My daughter was invited to a birthday party and she knew EXACTLY what she wanted to take for a gift. She wanted to give her sweet friend a magnet board. I had all the supplies already so it was a quick, fun gift for us to make. We called and found out the colors of her room and got to work.
She wanted a picture of them to put on the board, so we printed on off and we were done.
SHE LOVED IT!!!


Knob Necklace Holder

I have been wanting to make one of these for awhile now. I am soooo excited I finally got it done. I went to Hobby Lobby (heaven on earth) and there knobs were 50% off...SWEET!!!! I decided to surprise my daughter and make her the necklace holder for her room. I was so excited of the selection of knobs, I had to choose from. After selecting the perfect few and I went home and got to work. It literally took my 20 min to have it finished. I cut my wood, make sure you choose a pieces of wood that is thicker then the length of you knob screws, so they don't poke out the back.
I painted it my daughters favorite color, and then sanded the edges and distressed it with "Distress Ink". It was perfect. After I measured the right length for each knob, I pre drilled my holes and screwed my knobs in...that took the longest. It turned out SOOOOOOO cute. It costed me less then $10.00 to make. My daughter was soooo excited to see it in her room when she got home. I guess, I will need to make me one next.


SHARPIE Tie Dye

On President's Day my plans fell through for the day...too cold!!! So, I got creative to entertain my kids. I saw this Sharpie Tie Dye on Pinterest and wanted to try it out. I had some white tee shirts, I bought at the dollar store months ago. Then my daughter cleaned out her closet, so we had a lot of old white tanks to cut up. 
I cut them all up into squares and we tie dyed the afternoon away. My kids had sooo much fun. My 3 year old loved scribbling his best masterpiece and watching the colors run. I don't know what we will do with the beautifully colored squares....maybe a quilt :0)


Char, over at Crap I've Made has a great tutorial on how to make these.


Wednesday, February 8, 2012

Valentine's Day, Free PRINTABLE!!!

I put a couple of idea's, I found in the BLOG world and put them together. We made MUSTACHE's out of foam and put a sucker through them, then I made these little cards. It is such a fun, easy way to make your kids Valentines. Feel free to right click on the cards and print them for yourself.


Happy Crafting!!!

Monday, February 6, 2012

Stocking Holders


I finally moved into a house with a MANTEL, I was so excited to make some stocking holders. I found a great tutorial on "CRAP I'VE MADE", that got my mind going. I LOVED the pinks, turquoises, greens this year. So, I was EXCITED to find this great Christmas paper at Michael's. Here are my pictures of making the holders, if you want a step by step tutorial check at Char's at, CRAP I'VE MADE!!!


Now it's your turn. Happy Crafting!!!

Saturday, February 4, 2012

CHEVRON PRINT~LOVE

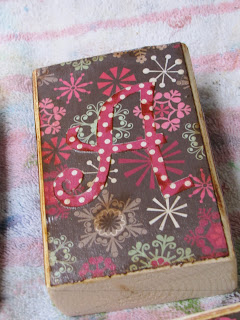
I LOVE everything made in CHEVRON...this Christmas I wanted to bring in the gorgeous, lime green, fantastic pink that this Christmas decor, brought in the stores. So, I grabbed a few extra wood blocks, and made a few fun, CHEVRON printed blocks. It looked so great on my mantel for Christmas. With the Pink and Green print, it is looks great with my Valentine mantel also, just think how fun orange and black would before HALLOWEEN!!! SIMPLE, FUN and COLOR!!!! LOVE IT!!!!


Valentine's Day

I finally got it done. I fell in LOVE with Char's idea from CRAP I'VE MADE, she did last year. I knew I had to make one. I found the letters on sale for $1 at JoAnn's. I had an extra piece of wood in the garage, added a fun turquoise color on the background. I AM IN LOVE IT!!! It gives such a fun pop of color and makes my mantel scream LOVE!!!!


Thursday, January 19, 2012

Quick Gift

Oh my goodness, talk about catching up. I haven't blogged forever, but I have been crafting like crazy. This will be the year to CATCH UP!!!
My daughter was invited to a birthday party, for a sweet little friend that has cancer. He is in and out of the hospital for treatments. The first thing that came to mind to make for him was a blanket of his favorite character "SPIDER-MAN". So, we went to the store and picked up some fleece.


I simply cut the edges about 2 inches in...


And then tied each strand in a knot


After I cut out his initials in matching fleece and sewed them on using a zig-zag stitch. It was such an easy gift, but it meant a lot. When he opened the blanket he just hugged it...


Our hero, Matthew!!! Happy Birthday, Buddy!!